| Do It Yourself Build 9' Canal Chunking Rod |
|
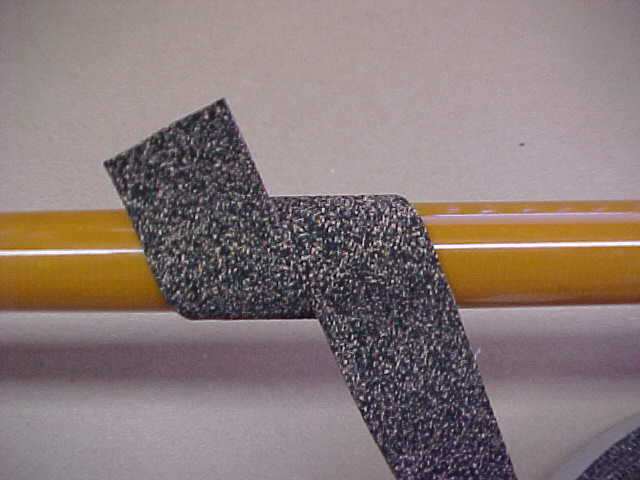
First Step First Step Using a file, Cut the tip back to fit the #16 Top approx ¾" With a fine toothed hacksaw or file cut the Lamiglas 1213M to a length of 9'. Make sure the cut is smooth & Straight for this will throw off the Spline (you should be cutting approx 11" off the Butt end of the Rod Most canal chunkin rods have a 24" long butt section. From the bottom of the blank measure up 25" and start wrapping your Cork Tape. To apply the cork tape simply remove the adhesive strip from the back and start rolling it on at an approx 45 degree angle to the blank. Continue till you fill the entire butt section leaving no gaps. Trim off the remaining portion flush to the end of the blank using a straight edged razor blade.  At the 24" mark, again using a single ring of masking tape as a guide, cut the cork tape with a razor, using just enough pressure to cut the cork tape with out scoring the blank. Finish each end off with -1/2 wraps of electrical tape.   Slide the reel seat style DPSD22T Fuji Trigger, down from the top of the blank to the cork tape. At this point you must build up the bottom of area where the seat will rest. By using masking tape, build up this area till the reel seat is snug but can still be move slightly. Slide the seat back and apply the Drywall cloth in one strip approx 1" down from what would be the top of the seat  Build the drywall tape up till it is the same height as the masking tape (snug but moveable). Slide the seat down over both, till it is up against the cork tape. At this point you must locate the Spine of the rod. Each rod has a backbone or a spine and it is very important to locate it when building a rod. Hold the rod at a 45 degree angle with the butt on a hard floor (no carpeting.) With an open right hand, support the tip of the blank from beneath. With your left hand press down in the middle section of the rod blank while slightly rolling the blank back & forth.  The blank should jump or pause and usually come to a rest in the same spot each time. This is the Spine of the rod. Guides for a spinning rod should be placed on the under side of the blank. Jig and trolling rods (Conventional Rods) are opposite of spinning rods and should be placed along the top of the Blank.  Adjust the reel seat till the trigger is facing upward. And the reel would be down. Next wrap electrical tape at least one inch up and one inch below the bottom of the seat onto the cork tape.  This is only temporary, the tape will stop any seepage of epoxy. Mix two-part rod builders epoxy, following directions carefully as to the mixture. With the rod blank standing straight up and down slightly heat the seat with a hair dryer. This will allow the epoxy to flow easier down inside the seat. Fill the seat with the epoxy to the top. Wait a minute and refill again as often as needed. Keep a rag handy in case you spill any epoxy. Let it set overnight preferably 60 degrees or above.  Next wrap cork tape on for a forgrip. Usually 6" - 7" overall length. Start this at the seat. It is much easier to get your starting angle this way. Feather the front of the cork tape with a fine file. This will make it easier apply thread later. Tape off each of the ends of the cork tape with 1-1/2 wraps of electrical tape. At the front of the fore grip tape 1"over the blank and 1-1/2"over the cork. These areas will be covered with thread later.    With Ferrule cement heat and glue the tip on the rod keeping in line with the reel seat. Now we will begin to mark the guide placement from the tip to the center of the 1st guide down # 12 is 6-1/2", 2nd #16 is 7-1/2", the 3rd #16 is 8-1/8", 4th #20 is 9-1/4", 5th #25 is 10-7/8", and 6th #30 is 12-1/2" (Largest Guide) All measurements are from center of one guide to center of the next guide.  Mark the center of each guide using a permanent marker or Paint Marker. If a dark color marker is used it may show through if a light color thread is used. We will be using Fuji BNLG Guides and BULT #16 Tip the cost is about $20. Place each guide up to the center mark in it's location, put an additional mark ¾" beyond on each side of the guide foot. This will be the over all size of your under wrap.  At the first mark using size D thread (colors your choice), start the wrap by making an X around the blank with the thread, hold the short end in place while spinning the blank. This will take some time getting use to. Try to run the thread through a thick book to keep tension on it. The deeper you place the thread in the book the more tension will be on the thread. Wrap about ¼" and cut off the short end, continue to wrap until you come ¼" from the end of the over all wrap. Using a spring-loaded paper clip or close pin to hold down the thread. This will allow you to work with both hands.   Cut another piece of thread which you will fold in half and use to pull your wrapping thread under the wrap. Place the tag end over the underwrap and extend the U-shaped end 1" past your last mark on this guide. Tape it down with Masking tape.  Continue to wrap the thread over the pull thread till you reach your last mark. At this point you must hold down the last few wraps of thread while you cut the thread from the spool, leaving 3"from the underwrap. Untape the pull thread, slide the tag end of your wrapping thread through the U-shaped pull thread and pull its end. This will lock the threads together. Cut this thread where it comes through the underwrap. Your underwrap is complete for this guide. Complete each of the remaining guides & top and bottom of the reel seat. The larger guides will have a longer underwrap and the smaller guides will have a slightly shorter underwraps for a more balanced appearance.   Overwraps Before you place the guides on the rod you must grind or file the guide feet. This will make it easier to climb up and over the guide feet with the overwraps. Place the guides on the underwraps make sure that the guide feet are evenly spaced. Tape down one side of the guide foot.  Start the overwraps 1/8" in from the underwrap and wrap up and over the guide foot stop ½" before the end of your wrap and insert the Pull Thread along the guide foot and continue to wrap and secure the overwrap the same way you secured the underwraps.  Continue until all the guide feet are wrapped. Apply color preserver if desired according to manufactures directions, usually two coats, and let is set, this will prevent the epoxy from changing or darking the thread colors. Epoxy To epoxy the rod you must have a spinner that will spin the rod between 6-18 RPM while it is drying, it will have to spin for between 4-7 hours depending on humidity and temperature. This will avoid any sagging in the epoxy and create a smooth finish. Most rod supply shops either sell or rent the dryers. They will also color preserve & apply the finish for about $10-$15. if you purchased the supplies from them. Mix the finish thoroughly and apply to the threaded areas according to manufactures directions and spin the rod. Checking occasionally to remove air bubbles with a quick pass of a lighter or alcohol burner make sure that you don't touch or burn the finish. Note that Excessive use of heat will only increase air bubbles |


