| Jigman's Hypnotic Needle |
|
The Guide to Custom Fishing Lure Building – Jigman’s Hypnotic Needlefish Lure. Adding attractive color, flash, effects, shiny scale patterns, and depth to the finish of your custom fishing plug. A little while back I agreed to do a step by step for Christmas. So, here it is, just in time. Bassmaster also agreed to do one on needles. I’m sure that will be so rather than compete with him, I’ll do one that will hopefully complement what he does. Here, I’ll show how to turn an ordinary needle into a “hypnotic needle”. I apologize up front for any poor photos I only have two hands. It is also hard to get a good shot of this thing that will show the “hypnotic” effects. Anyway…. 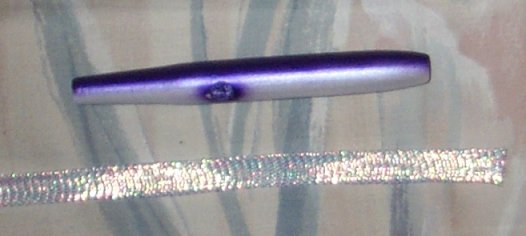 The first step is to attach the flex cord. Take a section of wire with the line tie already bent. Add the nose grommet and slide into the needle, but do not insert the grommet yet. Use a vise to hold the line tie end of the wire. I’m using a fly tying vise here. Take some thread and wrap around the wire to secure the thread. Thread color does not matter because you’ll never see it. Slide the flex cord over the needle (you can do this step before you insert the wire if you prefer) and pull it past the front of the plug. Now cut it to size making sure to leave a little extra length. 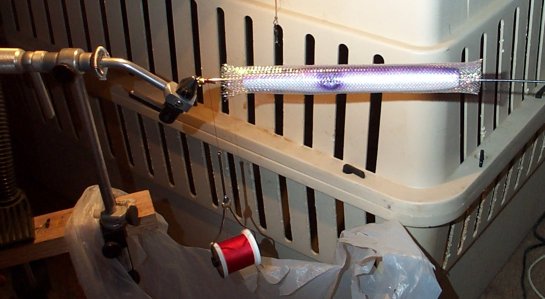 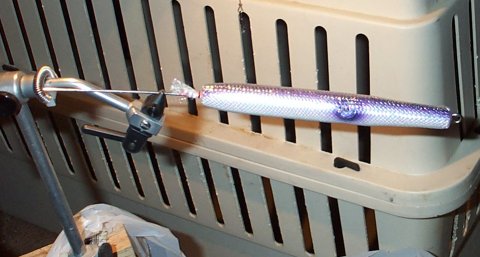 Make several wraps around the flex cord with the thread, then tie it off. Take the plug out of the vise and pull the thru-wire so the flex cord becomes flush with the front of the plug and the grommet is inserted. Reverse the plug in the vise, then secure the thread to the wire just behind the plug. Pull the flex cord tight over the plug, then make several wraps with the thread to secure it. At this point, I hit the back of the plug with a quick shot of paint. Use the same color as you did under the flex cord. In this case, I used pearl purple. You only need to shoot a thin line down the back. I also add a shot of red under the chin. Once this is dry, add the eyes to the plug. You’ll need to epoxy these in place and hold tight while the epoxy sets. The 5 minute Devcon works well for this. Once the eyes have set, take a pair of scissors or a sharp knife and carefully cut the flex cord from around the front hook hole. Apply a little epoxy, then insert the grommet.  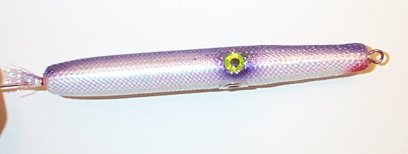 Now we are ready to apply the first coat of epoxy to the plug. I usually use Systems Three on my plugs, however, on the hypnotic needles I’m using Devcon. It’s a little thicker and sets quicker. You will end up with at least two coats, and may be three, of epoxy on the plug. You do not need glitter in the epoxy either. I use a short section of wire to apply the epoxy. 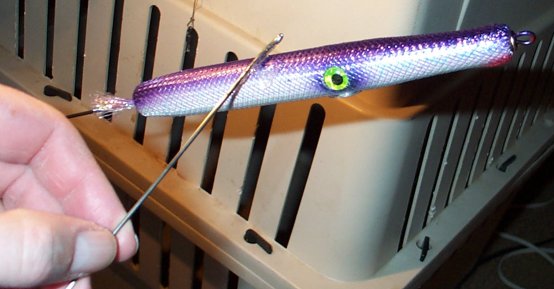 Once I get a good coat of epoxy on the plug, I’ll take a piece of stiff paper (the back cover of a Cabelas catalog in this case) and smooth out the epoxy. 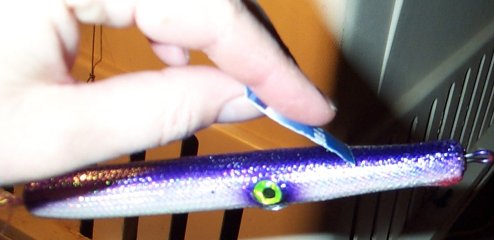 You can then put the plug on a rotator while the epoxy dries, or hang it by the nose, then flip part way through and hang by the tail. Once the epoxy has set, use a sharp knife to trim the excess flex cord from the tail of the plug. You’ll want to be able to insert the tail weight. Note that if you are not using a tail weight, you’ll trim the flex cord, then insert a tail grommet. Pull the wire out and add the swivel as you re-insert the wire. If you are adding a tail weight, you can test the weighing at this point. Once it is correct, insert the weight, add the tail grommet, and twist the wire at the back for the rear hook.  Now you can add the next coat of epoxy. You can do it the same way as above. Once the second coat is dry, you can determine whether or not you need a third coat. What you want to end up with is a relatively smooth surface. If you can feel the flex cord as you run your finger down the plug, you need another coat of epoxy (took three coats for this example). One thing to bear in mind as you are doing the flex cord, it really does not start to do its stuff until it is well coated with epoxy. Before you add the first coat of epoxy, the plug looks somewhat blah. Starts looking a little better after the first coat of epoxy. After the final coat, it does its hypnotic thing. By this I mean that it will change colors as the light catches it from different angles. It takes on a hue of the underlying plug colors. As Winchmaster noted about one, its, well, hypnotic. Hence its name. I’ve done a number of colors: blue, silver, white, green, gold, and purple. All have worked well so far with the pearl flex cord. The pictures here do not do the plug justice. Give it a shot, I think you’ll like the results. 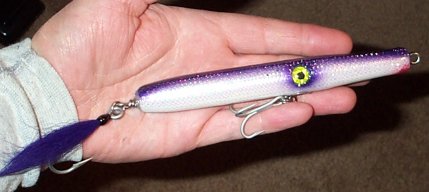 Original Thread: http://www.striped-bass.com/Stripertalk/showthread.php?t=11781 |

